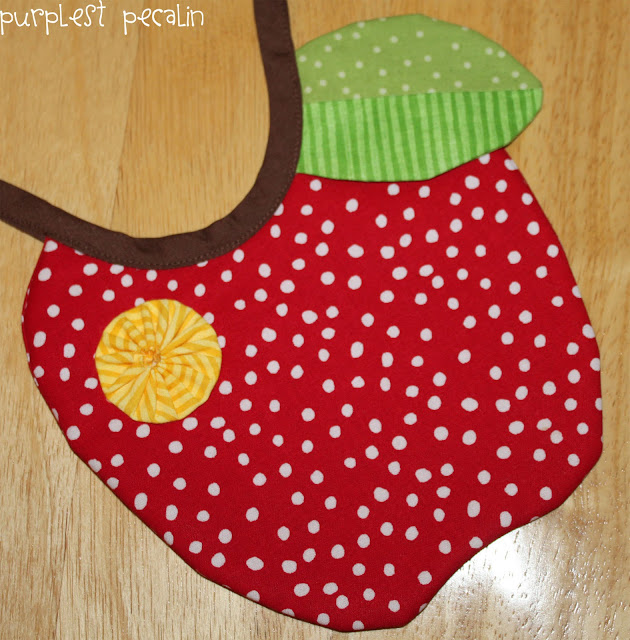
Showing posts with label baby. Show all posts

Monday, April 16, 2012

Handmade Customized Toy Blocks

My half birthday was a month ago yesterday. It's a stretch, I know. I'd say I actually remember on March 15th that I am on the downward slope toward wrapping up another year about 25% of the time. Doing the math here, that means, I have remembered it is my half birthday on the actual day 6 times in my life. Sounds about right. Obviously, this year was not one of those cases. Anywho, it also means that a sweet baby girl in my life is well on her way to being 3, which I just cannot believe. We both decided that September 15th would be a lovely day to be born, 22 years apart of course. That being said, I have actually been meaning to share these blocks I made over a year ago for my little birthday sharer, Ellie. They were her 1st birthday gift from me and I didn't even come close to topping them this past year. I've got less than 6 months to step up my game for the big 3.


Before there was pinterest - how did I survive?! - I ineffectively bookmarked ideas on my browser. I can't even find the original post I used any more since I made these before I started blogging, but it showed how to make handmade customized toy blocks using stickers and mod podge. The tutorial showed cutting up a 2x4 for the blocks. Not having the tools or wanting to buy a 2x4, I thought I would swing by SCRAP in Portland and test my luck in being able to pick up scrap wood for cheap. Lo and behold, I came away with all this for only a couple bucks. (If you live near Portland, Oregon you must go check out SCRAP on NE MLK out because it can be a gold mine for crafts as well as kid projects. They have a great mission, too!)

Isn't that wooden spool awesome?

I went to Michels to look at stickers. I was drawn to an under the sea themed sheet and so I went with it. I gathered various other supplies from SCRAP (scraps of felt, googly eyeballs, mirrors) and  fabric, ribbon and paint from my craft stash to create the blocks.


First, paint your blocks (if you wish) and allow to dry completely. Then, plan out your scenes, or at least where you want to place each sticker, so you use them all. I did this by cutting the sticker sheet up and laying them out on the blocks before actually peeling the stickers off and sticking them onto the painted wood.

Once you decide where you want them to go, place them as you wish, mod podging over them. I was worried about my 3D parts of the stickers, but after 2-3 coats of mod podge, they were down solid. (And in fact, are still holding up to this day.) Ready to be bombarded by pictures? Here's all the sides of the blocks!

I used sand paper for the sand (mod podged over it) and cut the felt out to make the fish and seaweed, plus a googly eye!


This is one block, all 6 sides.


Here are all four sides of the long, skinny block. I used more sand paper covered in mod podge under the crabs and some white puffy paint for the waves above the turtle and whale.


Next is the front and back of one of the square blocks and the circular block. Those last two words are too much of an oxymoron, but I'm not quite sure how else to describe it since I don't think of them as cylinders, which I guess technically they are, just very shallow.


I covered one block with fabric, super gluing it on. This didn't work too incredibly well, so I wouldn't recommend it for a whole set, but cute enough for one.


You can't see in the picture below, but I had 3 small circular blocks/cylinders/whatever with little holes in the middle, so I painted them and ran a ribbon through them, tying it together.


I used a large recycled almond tin to hold all the blocks and spray painted it before wrapping a ribbon around it.


That's it! I did this project over a few nights, so as to allow proper drying time for the paint and mod podge. The tutorial I looked at did not paint the wood or make little scenes like I did. She just put one sticker per block, which works if that is what you want or don't have enough time to make little scenes. These really are super easy, slightly time consuming, mostly due to waiting for paint (if you use it) and mod podge to dry, but so worth it because they are one of a kind! I want to make another set! So many possibilities...other animals, seasons, food, letters, people.


This post is linked up to some of the parties listed under my Show & Tell tab at the top of the page.

Saturday, November 12, 2011

Me + Seam Ripper = BFF

Yup, I'll admit it, I have definitely been slightly MIA on here for a few days at a time these past couple weeks. Wanna know why? I have a new best friend. Her name is Seam Ripper. But seriously, I got my sewing on these past few days to stock up for a couple little craft shows Michelle and I took part in.

Here are some of the goods I had for sale:


I made the bibs and taggie blankets while my sister made the blankets. As thankful as I am for that seam ripper, due to the repetitiveness of the bibs, I have already had to use it less and less. Go me! So maybe we aren't meant to be Best Friends Forever cause the more I sew, the more comfortable I become which means I don't mess up and need to call Seam Ripper, aaaaagain. Until the next new project anyway.

Do you have any projects you have battled and relied on the seam ripper too much for your own liking? I'm really loving learning how to sew better and faster.

Tuesday, September 13, 2011

DIY Taggie Blanket

Two of my friends had baby boys in July and I am (ugggh) just getting around to finally getting baby gifts made and sent off. I was quite excited to make something for little boys, as I really have only had little girls born around me lately ever.


Have you ever noticed how babies love the tags on blankets and stuffed animals? Probably. Well, I have seen these taggie blankets in stores, but thought since I have too many spools of ribbon for my own good, I should put them to use and make my own version.


Here's what you need to make one too:

18 x 14 inch piece of cotton
18 x 14 inch piece of flannel
ribbon, about 8-11 yards total (33 three to four inch pieces) -- I wanted to use varying widths so you may need a few more, if you use all the same width ribbon.

Note: Those supplies are just what I used. You can make yours smaller or bigger and add more or less taggies depending on what ribbon you have on hand, or what you think looks best. (Buying 1/2 yard of the two coordinating fabrics allows you to make 3 of these, but using 2 fat quarter would work just as well to make one.)

Here are the steps I took:


1. Cut your pre-washed fabric to desired size, in my case, 18x14 inches (about 1/3 of a half yard cut of 44" pre-washed fabric) and cut your ribbon into 3-4 inch pieces. I made mine longer if they were thicker. I just thought it looked better.

2. Pin the folded ribbons to the right side of one fabric, arranged as you want them to be. Sew all the way around to secure the ribbons.

3. Pin both pieces of fabric, right sides together. Use pinking shears, if desired around edges. Sew nearly around entire rectangle, leaving a couple inches for turning.   Then turn, inside out.

4. Don't forget to stitch up the last couple inches, then you're done!

There you have it - easy and handmade, just the way I like gifts to be! Please don't hesitate to ask any questions, cause I will be happy to answer.

Update: Here is a picture my friend sent me of her little boy enjoying his taggie blanket.


What a cutie patootie, huh?

Friday, June 10, 2011

Seester's First Project!

As a fabric-aholic for barely over a year, it feels quite nice to have some company in the form of a convert - my little sis, Hailey.

Since I've showed her my too big stash and some projects I had in mind, she started accompanying me to the fabric store and since then, has created her own mini stash. The first project she wanted to do was for a friend's baby.

With a yard of light pink minky to match a yard of snuggle flannel print, I helped her make this awesome blanket. Sew both sides together and finish with a satin trim. This is just easy enough for a sewing newbie. Plus, the blanket is the perfect size for the car seat or stroller so as not to drag, I know the new mom will love it!


I'm so proud of her and can't wait to see what else she comes up with. A great way to make Friday night very productive, even after a day filled with moving!

Tuesday, May 17, 2011

DIY Onesie & Matching Pants with Baby Booties

This an attempt to recreate the lost post that disappeared when Blogger was down last week. Take two!

I made these Itty Bitty Baby Booties for my friend Michelle's new baby, Olivia. She is closing in on 3 months now and keeps becoming more adorable.


Two things led me to create an entire matching baby ensemble using the Woodhaven Hearts fabric from JoAnn's. First, I had so much leftover fabric after making the booties, I probably could have made 5 more pairs, so I wasn't opposed to using a little more. Second, I had to use Heat 'n Bond to make the booties, which was a first for me and I fell in love with it. While I finished the booties, my mind raced with other ideas to use the Heat n' Bond for, such as the simple, DIY onesie pictured below.


I wanted to add a little something more to the onesie, so three little hearts were placed on the bum. The instructions included with Heat 'n Bond are simple and straightforward. Essentially, you iron the Heat 'n Bond on to the backside of the fabric. Then, peel off the backing, which at this point, gives you an iron-on transfer. Place it on whatever you wish (such as the onesie) and iron on to secure. For multiple washings, the instructions suggest sewing around the transfer. The hearts were so simple, I figured if they fell off, I'd just whip up another one to replace it.


I also ended up adding three more little hearts vertically on the bottom, left leg seam of these Carter's ruffled bum brown pants. Unfortunately, I didn't take a picture of the pants for some reason. She has probably outgrown them at this point, which is a good thing being nearly 3 months old and the pants are newborn sized. Maybe I'll snag a picture of just the pants to add later next time I'm over at her house.

But really, if you've never used Heat n' Bond, it's just so simple, you have got to try it. The possibilities are really endless! Plus, I love matching gifts and it is just so easy!

Tuesday, May 10, 2011

Baby Shower Thank You Cards

Welp, I realized I have a couple of projects I meant to blog about before I left to backpack through Peru over 2 months ago. Both of them were to go along with the posts regarding the baby shower I helped plan. (Shower Invites, Itty Bitty Baby Booties, Baby Olivia Herself) Geesh! Better late than never I believe. Plus, who doesn't love easy, cute, DIY gifts?

Handmade cards are the greatest and boy, do I love to receive them, especially in the mail! My friend, Michelle, is the queen of homemade cards. She never buys cards. Check out her Valentine's day cards (as well as others) here. Her and I have discussed how frustrated we get with some tutorials/showcases of handmade/scrapbooked cards because there is always some neat-o tool we are too poor to have. I do have an embosser that I love though. Other than that, no fancy schmancy tools here. (I'm really trying to be proud of being an Circut/Silhouette/Allothercutters Free Person....maybe tomorrow.)

Just over two months ago, Michelle had her baby, Olivia. I planned a bit of the shower and previewed the invitations on my blog before I left for Peru. I wanted to  to show you one of my gifts I gave her.


I figured with baby numero 2, making all the thank you cards she wanted to may not happen as easily or as promptly as she would like it to, so now all she has to do is write in them and mail them off! These cards are super easy to make and are definitely one of the most practical to give a new mom, particularly one who loves giving homemade cards.

All 10 paper patterns.

I used 25 pre-folded cards with envelopes by My Mind's Eye quite contrary by Jen Allyson & Zoe Pearn. I can't seem to find the exact pack anywhere, but scored the actual box of cards from Hobby Lobby in Austin, TX while visiting my friend Cara and making my inaugural trip to Hobby Lobby. (Can you believe there is not a single one in the state of Oregon?!) 

This collection fits Michelle's taste so well and it reminded me of the new baby's nursery, which is woodland themed. Then, I simply used a stamp that slightly matches the stamp on the invitations from Michaels. Using black ink on textured cream paper and adding a ribbon gave the cards a slight vintage look, but was simple and easy enough to do repeatedly to make a set.

She was tickled to get them and said that a couple of the patterns on the cards are so cute she wants to keep them instead of sending them away. My favorite on is pictured in the bottom right.

Tuesday, March 8, 2011

Itty Bitty Baby Booties

I'm always excited to start a new project, but in attempting my first pair of baby booties, I was more jazzed than usual. Not only do I just think itty bitty baby booties are too cute, it meant I had baby to give them to, Olivia Suzanne. I just can't get over how cute they are!


A few months ago at one of JoAnn's 99 cent Simplicity pattern sales, my sister and I stocked up on a couple of patterns, one being Simplicity 2491, which has 9 different booties in sizes XS-L. Ebay also has this pattern pretty darn cheap if you can't wait for JoAnn's to have their great sale.


I made booty C which is the one pictured in the top left hand corner. It was the easiest looking to me (or D, right hand side, middle, but I liked the folded loop). I chose to make size small because I didn't want the extra small be too small.

The fabric is also from JoAnn's and is called Woodhaven Hearts. I just love it! My favorite colors are blue and green, so I wish I could keep them for myself...however, I have no baby, which means no use for them. I'm not, however, in the slightest disappointed with the fabric I have left over :)


That being said, I have a lot of fabric left over. Do patterns (Simplicity or others) always "require" too much fabric. I'd obviously rather have too much fabric than not enough, but I had nearly four times the amount I needed.

So, here's what I'm going to do. Below, you will find a few things I would have found helpful to know before I bought fabric and made these:

1. You only need a piece of fabric that is 12x12 inches to make any size of booty C! It tells you to get 3/8 yard. You will have leftover if you buy 3/8 yard like I did.

2. I have a very old Morse sewing machine so it could completely blamed on its picky temperament, but the ribbon I used was too flimsy and would not allow for machine sewing, so it was done by hand.

3. I had extra fabric sandwich of wool, heat bond and cotton, so I cut out two green hearts to partially covered up the stitches from attaching the Velcro by fabric gluing them on top of the ribbon.

It was a little tough to get the first booty turned, but when I made the matching booty, it was much easier the second time around so I'm guessing as with most things, it will get easier and easier the more I make. What a great excuse to make more!

Be on the look out (maybe tomorrow!) for another part of the baby gift! Please feel free to ask me questions if you aren't sure about the pattern.

Friday, March 4, 2011

TBF List

TBF. To Be Finished. Anyone else have one of these lists that is so long, you cannot recall everything and every so often when you think of yet another project to add, it all becomes overwhelming? Yeah, me too.

If you can't relate, I'm guessing you're one of those people who is really, really good at finishing projects, does not belong to Professional Procrastinators United or gets easily distracted.

All that being said, I have never, ever understood how people (grown adults) are "bored." Get a hobby. Volunteer. Live your life! I found this yesterday on a friend from college's blog Thrifty Solutions for an Urban Gal.


I love every word on that and I'm a sucker for fun typeface stuff. Love it.

Anyways, despite my slight digression, I wanted to showcase those projects that got lost in No Deadline Land, in small hopes of getting me a little motivated to get them wrapped up upon return to the U.S. at the end of April. I know this sounds odd, but it's essentially so I don't forget about them!

1. Addison's Memory Quilt (for my niece): All of the clothing my sister picked, I cut up (reluctantly because baby clothes are just so precious), layout is done, binding, backing and border fabric has been purchased and pre-washed. Why on earth isn't this finished?!


2. Black & White Photos Scrapbooked (for my aunt): I've sorted all of the photos, organized them, picked out all the paper. Now to stick the pictures on the page, embellish and journal. No big deal.

Aren't these old photo albums great? (Minus the fact that the acidic paper ruins photos.)

3. High School Memory Quilt (for myself!): This project really hasn't been started, unless you consider all my high school shirts washed, folded and boxed up as started.

I am really excited to finally make a memory quilt from a couple dozen shirts in blue/navy and yellow/gold with Bulldogs, my high school mascot, like this one! Stay tuned for details.

4. Baby boy gifts: I know very few baby boys and finally I am really excited to make a baby care package for Ariana, one of my good friends from middle and high school who is due to have her baby in July. I have a quite a few baby item patterns I've purchased at JoAnn's 99 cent pattern sales that I want to try out. We'll see what makes the cut.

5. My first quilt: No real direction here yet. Just know I need to make one to justify my stash.

I'm going to stop there, even though I could go on with the amount of fabric I have. Those are my top 5 projects I plan on getting done by the end of summer for sure. Promise.

Tuesday, March 1, 2011

Welcome to the World Olivia Suzanne!

I can't help but create a quick post and brag about my amazing friend Michelle, her husband Steve and their new daughter, Olivia Suzanne, born in the wee hours of the morning. She is about an hour old here:


This is a camera phone photo, but isn't her skin just beautiful?! She was 7lbs 3oz and 20 inches long. What a beauty!

You can look forward to a handful of posts with baby related projects before I take off for Peru!

Monday, February 21, 2011

Sneak Peak! - Baby Shower Suite

I absolutely love planning parties. I haven't actually planned too many of them, due to lack of funds. I would have a party for every holiday if I could afford it. However, this just means that the parties I do get to plan or assist in planning are that much more special.

My friend, Michelle, is due to have a baby the second week of March (so soon! yay!) and I finally mailed all the invites out for a "meet the baby shower" since the mom to be wanted everyone from out of town to celebrate at a shower, as well as come into town and get to hold the baby. Therefore, the shower is a couple Saturdays after the due date. This is such a fun idea to me!

I am in the process of finishing up the rest of the decor and plans but here is a sneak peak at the invites:


First, I stuck the Martha Stewart dogwood cherry blossom border (from Michaels) to light pink scalloped cardstock and trimmed the edges. Next, I glued the ribbon onto the salmon colored cardstock. Then, I glued the scalloped light pink cardstock to the salmon colored cardstock. I trimmed each piece of text as close as I could get to the edges and glued the party info onto the light pink cardstock. Before gluing the "meet the baby shower" square onto the front, I slid the edge of each "meet the baby shower" square on top of a glue stick, then dipped each side into a pile of green glitter to give them a little sparkle. The stamp was purchased from Michaels as well and was one that Michelle pointed out many months ago that "would make a cute baby shower invite." She was right!
Related Posts Plugin for WordPress, Blogger...