Showing posts with label home. Show all posts

Friday, August 5, 2011

Window Shopping: Anthropologie

A few weekends ago, I was able to visit my good friends in Portland and we went to Sand in the City. It was lots of fun. We stayed in the Pearl District and so Michelle, Jo, Steph and I went window shopping inside of Anthropologie. All photo credit goes to Michelle, as she was in charge of the camera. Read on and enjoy a little inspiration from Anthro!

Starting off with one of my favorite photos Michelle took, that I think looks like it should be in their catalog or on their website.


This ceramic berry crate was probably my favorite thing I saw there. I just couldn't quite buy one for $14 and not know when/what for I would use it exactly. It's still on my radar. I simply love it.


A close second is this awesome ceramic egg carton. I really want one of these, too. So pretty!


Look closely and you can see the markings for measuring cups, awesomely disguised as old milk containers.


I was quite drawn to this pitcher. It reminds me of my grandmother for some reason. I love the texture and color.


Okay. Has anyone ever bought one of these candles? I thought the blue container was pretty, so I nonchalantly smelled it. And then smelled it again and again and again. I can say it may be the the best smelling candle I've ever sniffed.


The sweet toothed baker inside me couldn't help but love these painted wooden spoons. Plus, I loved how Anthropologie had them displayed: in a real sack of flour, which had spilled about, on the floor.


This is the inside view of what you would see from the window facing the street. Beautiful! I've been brainstorming how to replicate something like this...


And finally, from a cover of a book, an awesome quote. Michelle loved this too. She actually featured it on a post here. It could easily be a printable.


Where is your favorite place to window shop?

Tuesday, August 2, 2011

DIY Coaster Tiles [Pinterest Challenge Summer 2011]

Stopped pinning and made:


It was only last week that I joined Pinterest, but I fell fast and am so in love with it. Seriously though, I don't know what took me so long. Anyways, I could gush for a while, but I'll jump right into the project I chose to accomplish for:


I was so excited to see other bloggers' posts for this challenge, including the four who initiated the challenge: Sherry from Young House Love, Katie from Bower Power, Emily from Style by Emily Henderson and Lana from Making a House a Home. There is also a different link party on any of the previously mentioned sites for anyone who participated in this stop pinning and make it challenge.

Here's the pin I used for my challenge:


Suuuuuuper simple and sooooo inexpensive. No exaggeration. Read on.

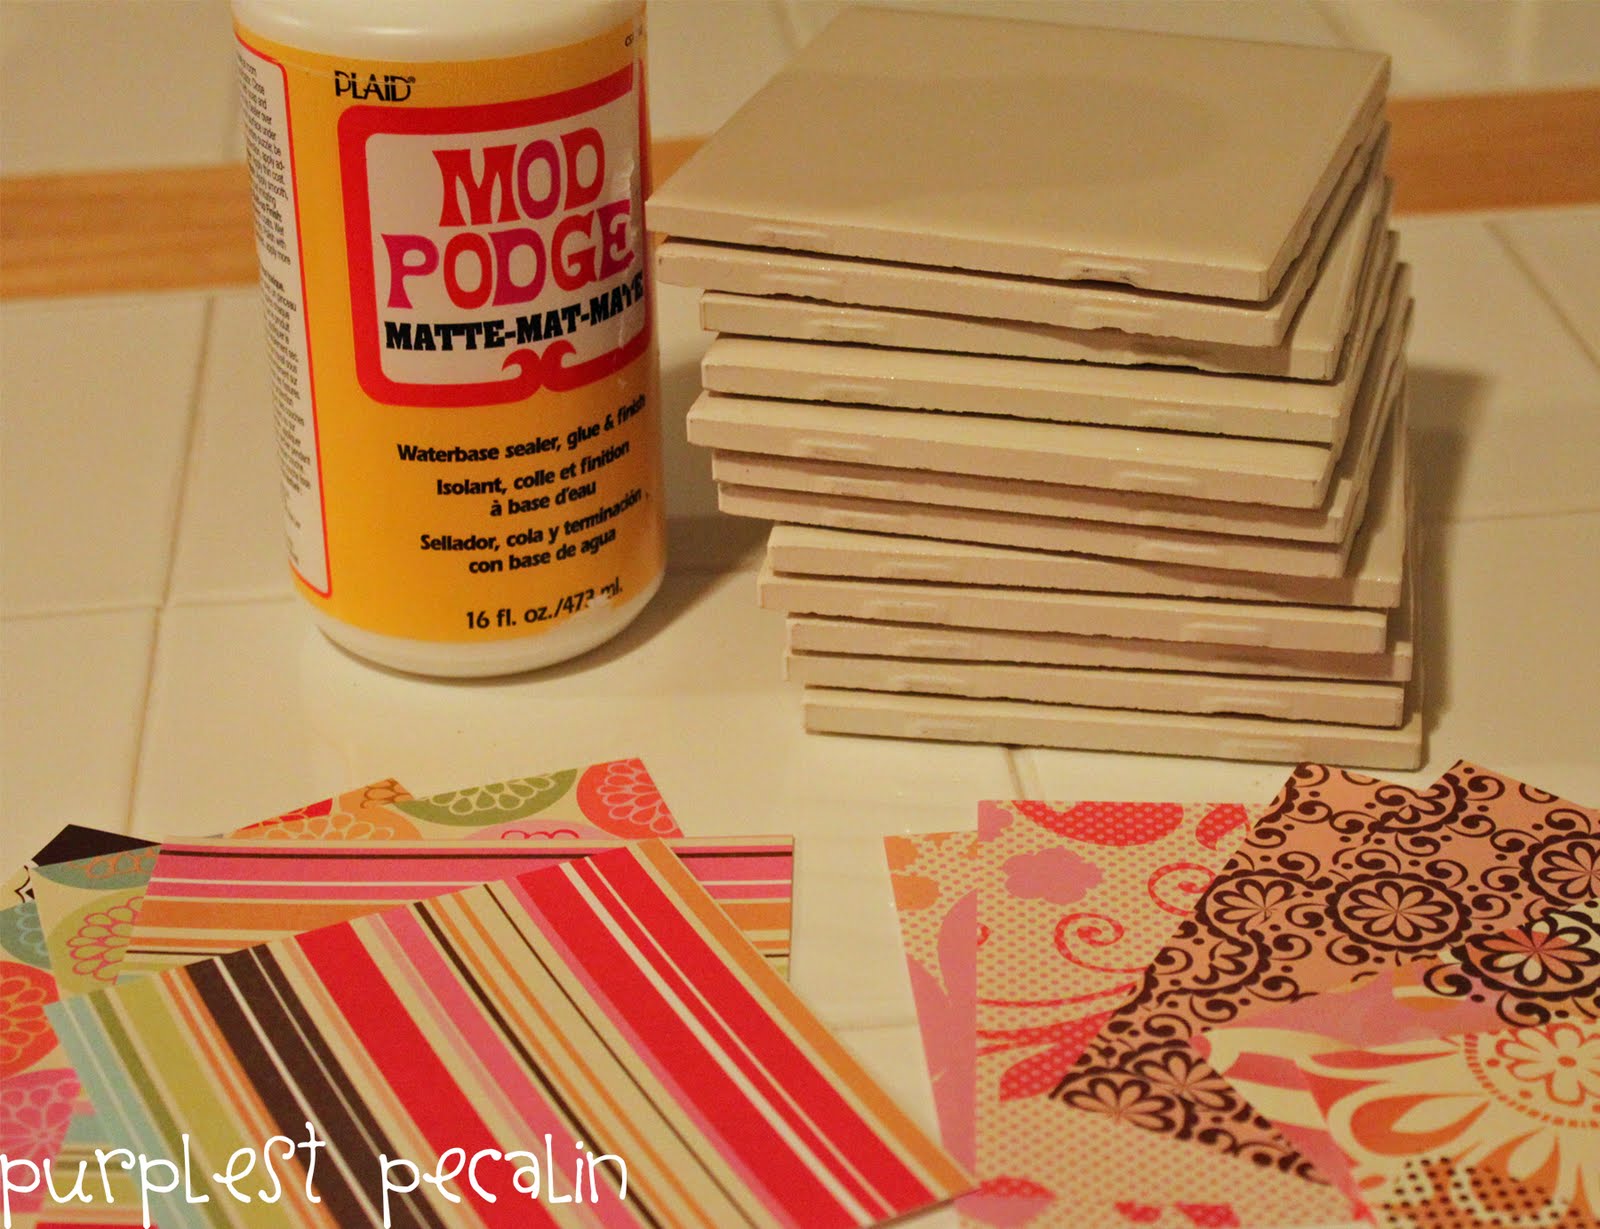
All you need:
  1. mod podge
  2. paper (your stash is waiting to be busted)
  3. 4x4 inch tiles (Home Depot for 16 pennies each!)
  4. felt (optional, if you want to protect whatever the coasters will sit on)
  5. glue gun or heavy duty sticker - like 3M products (only necessary if you are using felt on the bottom)


Cut paper of your choice to fit your tiles. I cut mine 4 1/8 inch by 4 1/8 inch because I wanted the paper right up to the edge of the tile. Then, mod podge the paper onto the tile, making sure to get it nice and smooth. Let dry. Give it a second coating if you wish.


Finally, an optional, but finishing touch to complete the coasters, is adding felt to the bottom of the tiles. To do so, just cut a 4x4 inch square of felt and attach.


I couldn't help but buy 12 tiles, so I made two sets of 6. Not quite sure which one I like more, but I think one set may become part of a wedding gift for one of the two weddings I am attending in the next month.


So, there it is, my first Pinterest Project. I'm hoping to stay motivated to make/do more of the inspiration I pin. What does one do with a pin once it has been created? Do I delete it from my board? If it were a cork board, I guess I would probably take it down...Thoughts?

Wednesday, June 29, 2011

Poor Man's DIY Home Security

A few weeks ago, I briefly mentioned moving into a new house. Boxes still feel never ending, but I do love finding new homes for everything.

The first time my dad came to see the house, before we had moved in, he informed us it was a necessary to make our own "poor man's security system." This entails having dowels cut to fit all the windows and sliding glass door. You know where you put the stick behind the sliding door/window and it stops anyone from opening the window/door, from the inside or outside? Dad has also not forgotten to mention this necessity every time I've seen him since. He also said the dowels should be accompanied by bells hung on the doorknobs at night, so we hear anyone trying to break in. I love him.

Here's how I fulfilled his request (and you can make your own):

First, go to your local hardware store, or  even Fred Meyer, and purchase 1 1/8 inch diameter wooden dowels. I believe they are about 4 feet long. At Freddy's they are in the paint section. Measure your windows/door spots first. I didn't do this and could have saved myself a dowel (which are about $4 each) because two windows were short enough to only require one stick.


Then, mark your dowels like so:


I also marked which piece was for which room. This will save you the puzzling game of trying to fit the right cut ones in the correct spots when you're finished cutting.

Next, cut each dowel where you marked. This was by far the most exciting part because I was able to use (for the second time since Christmas!) my Craftsman 4-in-1 Reciprocating Saw.


You could totally be done here and put all your dowels into their respective places, unless you want to give them a little pop. Read on.

I love spray paint (as apparent in yesterday's post), particularly this soft blue color (Krylon Indoor/Outdoor Blue Ocean Breeze) I had on hand. So I wrapped my dowel in painting tape. Tip: Do not force the tape or stress about the spiral of tape being equal distance apart from the previous spiral. If you start the tape in one direction, it will naturally fall equal distance apart from itself. The minute you try to start placing it yourself by eyeballing it, you will end up with bumps in your tape and uneven spirals.


I could have totally just left this tape because the green was super cute! This made me think of how you could also cover the dowels in the super cute designs of duct tape, too!

Then spray paint it.


You could also do a checkered one, straight stripes or whatever else your creative brain thinks up! Just to give your window (or the kids') a little pop!

Partying at Tatertots & Jello's Weekend Wrap Up. Go check it out!
Related Posts Plugin for WordPress, Blogger...