Showing posts with label DIY. Show all posts

Monday, May 21, 2012

DIY Five Strand Braided Headbands

I thinned out my closet and had a number of old t-shirts I no longer wore, but thought they might work well for a project I pinned. It's super easy and fun to make use of old t-shirts I would have otherwise had to toss as they weren't even fit for a goodwill run.


If you've never done a 5 strand braid, the original post I pinned and used to make these headbands has a great photo how-to. It takes a little bit of practice, but once you get the hang of it, you might become addicted. I have made 4 headbands and am pretty sure I will be making some friendship bracelets for old time's sake using this new way to braid.

Monday, April 16, 2012

Handmade Customized Toy Blocks

My half birthday was a month ago yesterday. It's a stretch, I know. I'd say I actually remember on March 15th that I am on the downward slope toward wrapping up another year about 25% of the time. Doing the math here, that means, I have remembered it is my half birthday on the actual day 6 times in my life. Sounds about right. Obviously, this year was not one of those cases. Anywho, it also means that a sweet baby girl in my life is well on her way to being 3, which I just cannot believe. We both decided that September 15th would be a lovely day to be born, 22 years apart of course. That being said, I have actually been meaning to share these blocks I made over a year ago for my little birthday sharer, Ellie. They were her 1st birthday gift from me and I didn't even come close to topping them this past year. I've got less than 6 months to step up my game for the big 3.


Before there was pinterest - how did I survive?! - I ineffectively bookmarked ideas on my browser. I can't even find the original post I used any more since I made these before I started blogging, but it showed how to make handmade customized toy blocks using stickers and mod podge. The tutorial showed cutting up a 2x4 for the blocks. Not having the tools or wanting to buy a 2x4, I thought I would swing by SCRAP in Portland and test my luck in being able to pick up scrap wood for cheap. Lo and behold, I came away with all this for only a couple bucks. (If you live near Portland, Oregon you must go check out SCRAP on NE MLK out because it can be a gold mine for crafts as well as kid projects. They have a great mission, too!)

Isn't that wooden spool awesome?

I went to Michels to look at stickers. I was drawn to an under the sea themed sheet and so I went with it. I gathered various other supplies from SCRAP (scraps of felt, googly eyeballs, mirrors) and  fabric, ribbon and paint from my craft stash to create the blocks.


First, paint your blocks (if you wish) and allow to dry completely. Then, plan out your scenes, or at least where you want to place each sticker, so you use them all. I did this by cutting the sticker sheet up and laying them out on the blocks before actually peeling the stickers off and sticking them onto the painted wood.

Once you decide where you want them to go, place them as you wish, mod podging over them. I was worried about my 3D parts of the stickers, but after 2-3 coats of mod podge, they were down solid. (And in fact, are still holding up to this day.) Ready to be bombarded by pictures? Here's all the sides of the blocks!

I used sand paper for the sand (mod podged over it) and cut the felt out to make the fish and seaweed, plus a googly eye!


This is one block, all 6 sides.


Here are all four sides of the long, skinny block. I used more sand paper covered in mod podge under the crabs and some white puffy paint for the waves above the turtle and whale.


Next is the front and back of one of the square blocks and the circular block. Those last two words are too much of an oxymoron, but I'm not quite sure how else to describe it since I don't think of them as cylinders, which I guess technically they are, just very shallow.


I covered one block with fabric, super gluing it on. This didn't work too incredibly well, so I wouldn't recommend it for a whole set, but cute enough for one.


You can't see in the picture below, but I had 3 small circular blocks/cylinders/whatever with little holes in the middle, so I painted them and ran a ribbon through them, tying it together.


I used a large recycled almond tin to hold all the blocks and spray painted it before wrapping a ribbon around it.


That's it! I did this project over a few nights, so as to allow proper drying time for the paint and mod podge. The tutorial I looked at did not paint the wood or make little scenes like I did. She just put one sticker per block, which works if that is what you want or don't have enough time to make little scenes. These really are super easy, slightly time consuming, mostly due to waiting for paint (if you use it) and mod podge to dry, but so worth it because they are one of a kind! I want to make another set! So many possibilities...other animals, seasons, food, letters, people.


This post is linked up to some of the parties listed under my Show & Tell tab at the top of the page.

Tuesday, September 13, 2011

DIY Taggie Blanket

Two of my friends had baby boys in July and I am (ugggh) just getting around to finally getting baby gifts made and sent off. I was quite excited to make something for little boys, as I really have only had little girls born around me lately ever.


Have you ever noticed how babies love the tags on blankets and stuffed animals? Probably. Well, I have seen these taggie blankets in stores, but thought since I have too many spools of ribbon for my own good, I should put them to use and make my own version.


Here's what you need to make one too:

18 x 14 inch piece of cotton
18 x 14 inch piece of flannel
ribbon, about 8-11 yards total (33 three to four inch pieces) -- I wanted to use varying widths so you may need a few more, if you use all the same width ribbon.

Note: Those supplies are just what I used. You can make yours smaller or bigger and add more or less taggies depending on what ribbon you have on hand, or what you think looks best. (Buying 1/2 yard of the two coordinating fabrics allows you to make 3 of these, but using 2 fat quarter would work just as well to make one.)

Here are the steps I took:


1. Cut your pre-washed fabric to desired size, in my case, 18x14 inches (about 1/3 of a half yard cut of 44" pre-washed fabric) and cut your ribbon into 3-4 inch pieces. I made mine longer if they were thicker. I just thought it looked better.

2. Pin the folded ribbons to the right side of one fabric, arranged as you want them to be. Sew all the way around to secure the ribbons.

3. Pin both pieces of fabric, right sides together. Use pinking shears, if desired around edges. Sew nearly around entire rectangle, leaving a couple inches for turning.   Then turn, inside out.

4. Don't forget to stitch up the last couple inches, then you're done!

There you have it - easy and handmade, just the way I like gifts to be! Please don't hesitate to ask any questions, cause I will be happy to answer.

Update: Here is a picture my friend sent me of her little boy enjoying his taggie blanket.


What a cutie patootie, huh?

Monday, September 5, 2011

Tin of Dates Wedding Gift

Yesterday, I went to my 3rd wedding in a month. I must be at that age. I don't feel old enough to be, but alas, my birthday countdown can be measured by my two hands now. (I'm still young if I count down to my birthday, right?!) Anywho, I made this tin of dates for the bride and groom.


I saw the idea of a Can o' Dates weeks ago on Tatertots & Jello Weekend Wrap Up. It was originally posted by the Dating Divas. I thought the can was a little big and didn't want the bride and groom to have to figure out where to keep it. So, I bought this smaller tin at Michael's and cut the paper to fit inside. It is about the size of your hand, perfect for a drawer in your nightstand or desk.


I used about 30 of the date ideas from the Dating Diva's PDF file. They've got loads that are really fun and cute! This makes a unique gift the newlyweds can share for a long time. This is one of my favorites: Record a video together asking/answering questions. Great idea to give to your kids later or watch further down the road. I turned this one into a more involved, special accordian card in order to give some question ideas to start out with.


I modge podged the script "i love you" paper to the top of the tin, embellishing it with a monogram and ribbon. I loved the way it all turned out. Plus, it's great it is so small because it will be easy to transport back across the country where my newlywed friends flew home.

This is a very inexpensive gift. You could always throw in a gift card or two for the movie theater or to the couples' favorite restaurant as more of a traditional date. Here are another couple inexpensive, creative and easy wedding gift ideas I've made recently: "I love you because" frame and modge podge coasters.

And because I can't help but share a little beauty from the evening, check out these gorgeous Kate Spade shoes the bride wore.


I had a great seat at the wedding and snagged this precious picture of the bride and her dad headed for the aisle. I just love it.


Congrats Danielle & Donovan! I loved sharing your big, beautiful day with you and wish you all the best in your long, happy future together.

Friday, August 26, 2011

Because There Are So Many Reasons

It has taken me far too long to get this anniversary gift to my awesome friends, Steve and Michelle, as their 3 year anniversary was at the beginning of the month. But that means, I also couldn't blog about it without Michelle knowing what it was, since she reads my posts most of the time. I did show off my uber simplistic wrap job yesterday. And now, for the gift reveal....


[Anyone have any tips on photographing frames without getting the glare? Those are my kitchen cabinets in the background. Grrr.]

We saw this idea at Crafty Wonderland last winter. Since then, I feel like I've seen it here and there around the blogosphere, as well as here on etsy.

I have kept it in mind to give to her as a gift because we were both in love with it and it really is just so sweet. Not to mention supremely easy to make one of your own. I even printed a few different fonts and colors to allow changing for mood/seasons. In fact, I have plans to make one more, maybe two for a couple different weddings that are coming up.


All you need to do is:

1. Find a frame.
2. Pick your favorite font and type the words as you want them to appear.
3. Print.
4. Hang.
5. Keep a dry erase marker handy.
6. Make family members' days by filling in the endless amounts of reasons you love them.

How great would this be to have near the most used door in your home to greet or send off family members each day?

Tuesday, August 2, 2011

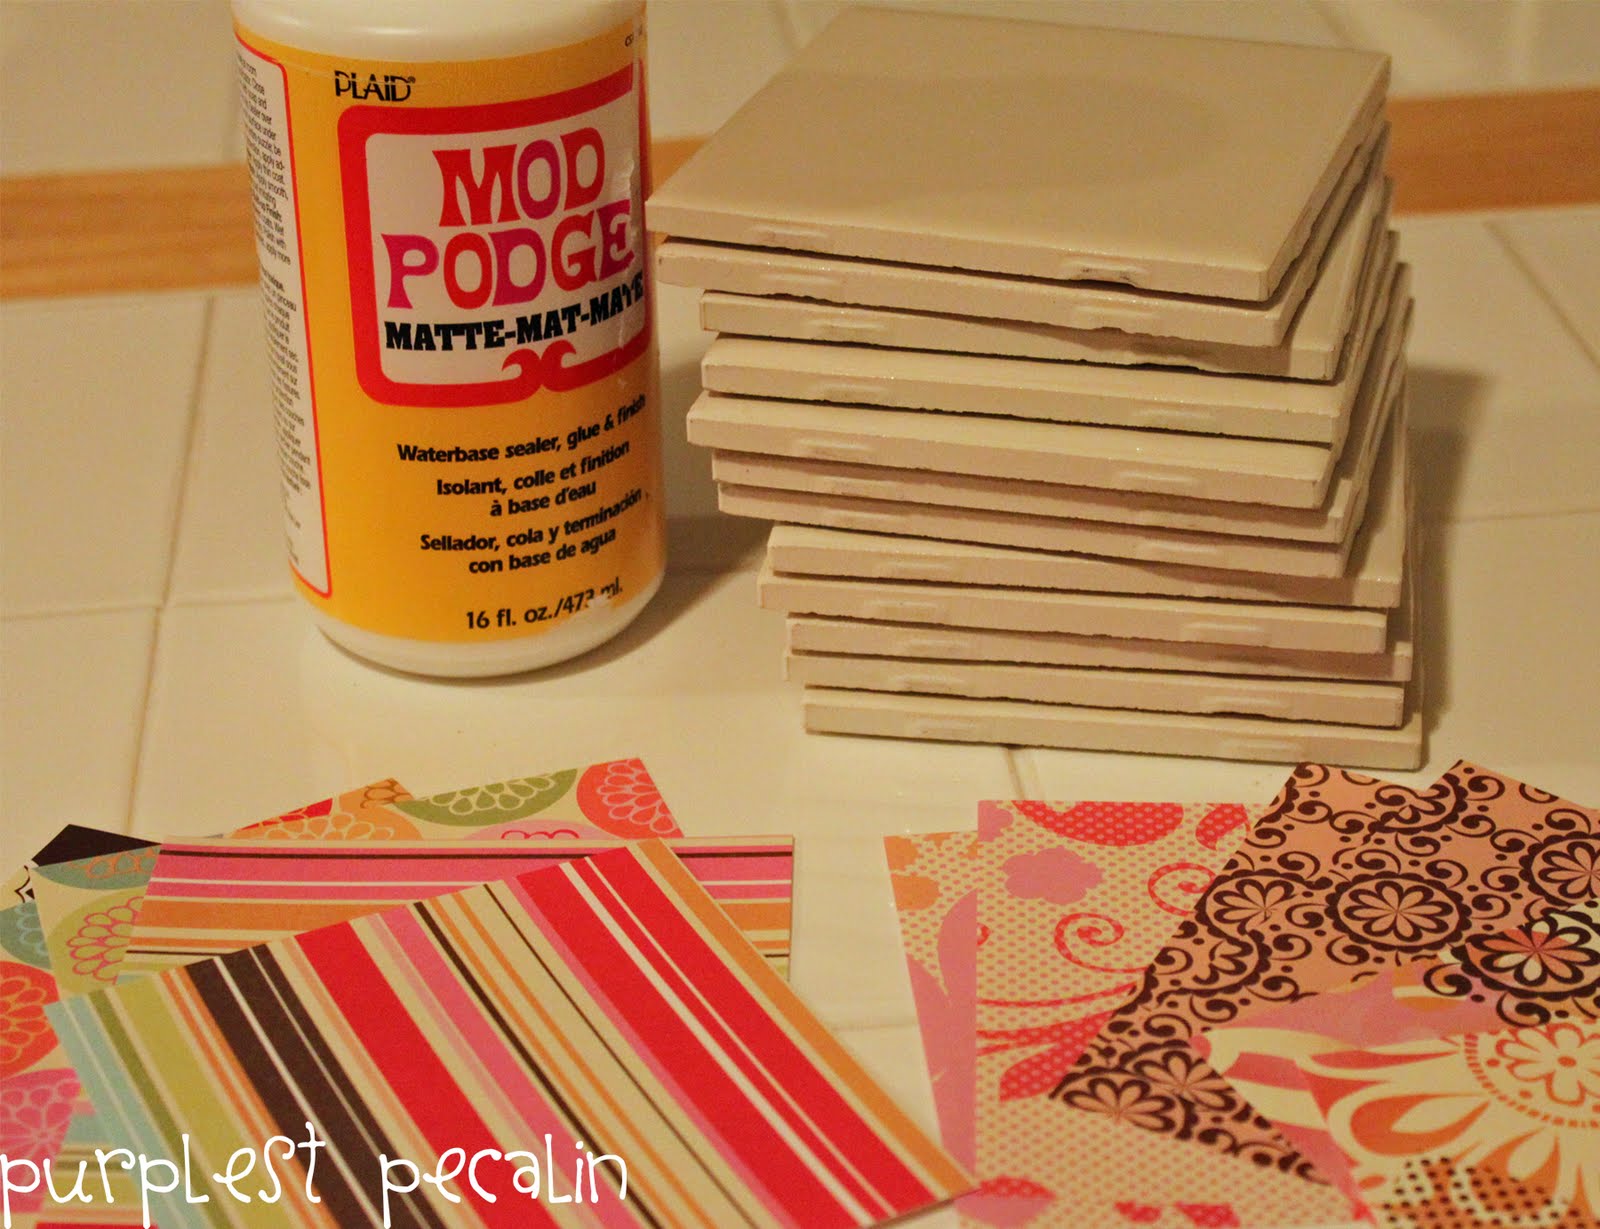
DIY Coaster Tiles [Pinterest Challenge Summer 2011]

Stopped pinning and made:


It was only last week that I joined Pinterest, but I fell fast and am so in love with it. Seriously though, I don't know what took me so long. Anyways, I could gush for a while, but I'll jump right into the project I chose to accomplish for:


I was so excited to see other bloggers' posts for this challenge, including the four who initiated the challenge: Sherry from Young House Love, Katie from Bower Power, Emily from Style by Emily Henderson and Lana from Making a House a Home. There is also a different link party on any of the previously mentioned sites for anyone who participated in this stop pinning and make it challenge.

Here's the pin I used for my challenge:


Suuuuuuper simple and sooooo inexpensive. No exaggeration. Read on.

All you need:
  1. mod podge
  2. paper (your stash is waiting to be busted)
  3. 4x4 inch tiles (Home Depot for 16 pennies each!)
  4. felt (optional, if you want to protect whatever the coasters will sit on)
  5. glue gun or heavy duty sticker - like 3M products (only necessary if you are using felt on the bottom)


Cut paper of your choice to fit your tiles. I cut mine 4 1/8 inch by 4 1/8 inch because I wanted the paper right up to the edge of the tile. Then, mod podge the paper onto the tile, making sure to get it nice and smooth. Let dry. Give it a second coating if you wish.


Finally, an optional, but finishing touch to complete the coasters, is adding felt to the bottom of the tiles. To do so, just cut a 4x4 inch square of felt and attach.


I couldn't help but buy 12 tiles, so I made two sets of 6. Not quite sure which one I like more, but I think one set may become part of a wedding gift for one of the two weddings I am attending in the next month.


So, there it is, my first Pinterest Project. I'm hoping to stay motivated to make/do more of the inspiration I pin. What does one do with a pin once it has been created? Do I delete it from my board? If it were a cork board, I guess I would probably take it down...Thoughts?

Thursday, July 7, 2011

Bookshelf Beautification on a Budget

Since Addison's new bed is chocolate brown in color, my sister and I wanted her bookcase to match. Having next to no budget to buy her a new one, we used her old one and spray painted it! Spray paint is such a great solution to give something a new look! (If you want to see some of my recent love for spray paint, look here and here.)


We were so excited to use American Accents Espresso spray paint, we forgot to take a Before picture. So, here is the Almost Before picture.


And the After picture.


Not too shabby of a "new" bookshelf for a whopping $3.99.

Wednesday, June 29, 2011

Poor Man's DIY Home Security

A few weeks ago, I briefly mentioned moving into a new house. Boxes still feel never ending, but I do love finding new homes for everything.

The first time my dad came to see the house, before we had moved in, he informed us it was a necessary to make our own "poor man's security system." This entails having dowels cut to fit all the windows and sliding glass door. You know where you put the stick behind the sliding door/window and it stops anyone from opening the window/door, from the inside or outside? Dad has also not forgotten to mention this necessity every time I've seen him since. He also said the dowels should be accompanied by bells hung on the doorknobs at night, so we hear anyone trying to break in. I love him.

Here's how I fulfilled his request (and you can make your own):

First, go to your local hardware store, or  even Fred Meyer, and purchase 1 1/8 inch diameter wooden dowels. I believe they are about 4 feet long. At Freddy's they are in the paint section. Measure your windows/door spots first. I didn't do this and could have saved myself a dowel (which are about $4 each) because two windows were short enough to only require one stick.


Then, mark your dowels like so:


I also marked which piece was for which room. This will save you the puzzling game of trying to fit the right cut ones in the correct spots when you're finished cutting.

Next, cut each dowel where you marked. This was by far the most exciting part because I was able to use (for the second time since Christmas!) my Craftsman 4-in-1 Reciprocating Saw.


You could totally be done here and put all your dowels into their respective places, unless you want to give them a little pop. Read on.

I love spray paint (as apparent in yesterday's post), particularly this soft blue color (Krylon Indoor/Outdoor Blue Ocean Breeze) I had on hand. So I wrapped my dowel in painting tape. Tip: Do not force the tape or stress about the spiral of tape being equal distance apart from the previous spiral. If you start the tape in one direction, it will naturally fall equal distance apart from itself. The minute you try to start placing it yourself by eyeballing it, you will end up with bumps in your tape and uneven spirals.


I could have totally just left this tape because the green was super cute! This made me think of how you could also cover the dowels in the super cute designs of duct tape, too!

Then spray paint it.


You could also do a checkered one, straight stripes or whatever else your creative brain thinks up! Just to give your window (or the kids') a little pop!

Partying at Tatertots & Jello's Weekend Wrap Up. Go check it out!

Tuesday, June 28, 2011

DIY Kitchen Canisters

I had been saving these tin canisters from the recycling forever. So I was quite excited when I figured out a use for them!


Nothing a little spray paint can't spruce up. Just wash out and dry your tins, then add a layer or two of spray paint and ta-da!


I used Krylon Indoor/Outdoor Gloss Blue Ocean Breeze and American Accents Smooth Satin Finish Seaside Green.

I thought some ribbons would look cute. Although, I think I need thicker ribbon.


I love how easy and simple this was. Seriously, like 10 minutes max to complete, plus drying time. What have saved from the recycling to put to use in your house?

Sharing Tatertots & Jellow's Weekend Wrap Up and these awesome blogs...

Photobucket

  Anything Related 

Thursday, May 26, 2011

Indoor Play Tent Tutorial

Sometimes, things you never knew you were looking for, end up smiling and waving hello at the most unexpected moment. I thought I was going to take a break from daydreaming about a future home as mentioned here and here. However, as I normally do when stumbling upon a new blog, I was checking out the About Me section (one of my faves!) and then of course, the Tutorials, or in this case "Tutes" over at Living With Punks.

A couple posts ago, I couldn't get enough of reading nooks. Here is one picture I featured from The Boo and the Boy.


I'm sure you've oogled over these in catalogs such as Pottery Barn Kids. Seems like you could make one if you thought about it hard enough, right? That's what Susan from Living with Punks thought too. She even went so far as to make a tutorial and share it!


How precious is the Minnie Mouse themed tent? My niece loves to hide in the racks at clothing stores and what little kid doesn't love their own little hide out? Susan's tutorial looks great. I am adding this to my potential birthday gifts to make for my niece's 3rd birthday. It's coming up soon, so we shall see!
Related Posts Plugin for WordPress, Blogger...