Thursday, September 29, 2011

Buttermilk Blueberry Breakfast Cake

I told you we had too many blueberries (thanks to Grammy!) to consume quickly enough before they went bad. And that is saying something since I have a niece who eats berries like candy.

In addition to the Blueberry Snickerdoodle Cookies from Monday, I tried this recipe from Alexandra's Kitchen. Let me tell you, the batter was sooooo yummy. I may or may not have had more than one spoonful of it, raw egg and all. Tsk tsk. But, you will too when you make this.


Buttermilk Blueberry Breakfast Cake
by Alexandra from Alexandra's Kitchen
Serves 6-8

½ cup unsalted butter, room temperature
2 tsp. lemon zest or more — zest from 1 large lemon
7/8 cup + 1 T. sugar
1 egg, room temperature
1 tsp. vanilla
2 cups flour
2 tsp. baking powder
1 tsp. kosher salt
2 cups fresh blueberries
½ cup buttermilk

1. Preheat the oven to 350ºF. Cream butter with lemon zest and 7/8 cup of the sugar until light and fluffy.

2. Add the egg and vanilla and beat until combined. Meanwhile, toss the blueberries with ¼ cup of flour, then whisk together the remaining flour, baking powder and salt.

3. Add the flour mixture to the batter a little at a time, alternating with the buttermilk. Fold in the blueberries.

4. Grease a 9-inch square baking pan (or something similar) with butter or coat with non-stick spray. Spread batter into pan. Sprinkle batter with remaining tablespoon of sugar. Bake for 35 minutes. Check with a toothpick for doneness. If necessary, return pan to oven for a couple of more minutes. (Note: Baking for as long as 10 minutes more might be necessary.) Let cool at least 15 minutes before serving.


Addie thought it was her birthday cake and Michelle and Steve devoured half of it. (Not to embarrass them or anything, but they did.) Success.

Wednesday, September 28, 2011

Chicken Broccoli Cheddar Braid

Tried another recipe from, you guessed it, Pinterest. Yet again, we were not let down. This time, it was a Broccoli Cheddar Chicken Braid by Cat from Food Family Finds.


Just like the Baked Chicken Cheese Filled Rolls we tried a few nights ago, this recipe also uses crescent rolls. This one is even easier than that one. It does call for fresh rosemary to be sprinkled on top of the braid. It seems as if I almost always don't have one ingredient and tend to just try recipes anyway, as long as I know it isn't a completely necessary ingredient. Also, the original linked recipe above is double the recipe below.

1 can crescent rolls 
1 cup chicken chunks, cooked
1 cup cheddar cheese
1 cups broccoli, steamed and chopped
1/4 cup light mayonnaise
1/2 egg yolk (approximately)
fresh rosemary
Preheat oven to 375 degree. On a parchment paper lined cookie sheet, spread can of crescents length wise to form a long rectangle. Press each of the seams to form a single layer of dough.

In a large bowl, combine chicken, cheese, broccoli and mayonnaise. Spread mixture over the center of the croissant dough evenly to create a log. 

Using a sharp knife, cut horizontal strips 1 inch apart down each side of the crescent dough. Fold the dough strips over the top of the chicken mixture, alternating left and right to create a braid.
Brush the top of the braid with a beaten egg yolk and sprinkle fresh rosemary on top.
 
Bake for 26 – 28 minutes until golden brown. (If you use this recipe doubled to what the original post calls for, the bake time is 28-30 minutes.)

Halved recipe shared here serves 4.


Have you already thought what my sister and I voiced almost in sync while enjoying this for dinner? Yes, we thought bacon should most definitely be added to this recipe next go around.

Tuesday, September 27, 2011

Bee Sew Happy

Doesn't it just make you so happy to finish something? I love that my sister likes sewing with me. It's nice to have someone who can geek out about fabric, get giddy over picking patterns and then happily show off finished products with, especially since Michelle and I live entirely too far away from each other. If this wasn't the case, the 3 of us would be doing previously mentioned old lady things all together.

Months ago, I showed off her first baby blanket she made that I was so excited about. Now that she finished this fleece bee pillow, I couldn't help but share it since it is just so dang cute. I love rick rack.


She used the pattern by Simplicity #2197. (Link goes to the cheapest I found it online, but you can always keep an eye out for JoAnn's 99 cent pattern sales, too!) The shapes really aren't too hard though, so you could always just eyeball it to replicate it. As a beginner, she did find the pattern easy and quick. Plus, the pattern, per usual, called for far more fabric than needed, which means there will probably be a second bee sewn for a gift.

Monday, September 26, 2011

Blueberry Snickerdoodle Cookies

We have so many blueberries and they needed to be eaten in some way, shape or form fast, so as not to go bad. Solution: bake something, obviously. Of course, I didn't have to look very far to find a recipe I wanted to try. Yup, my Pinterest Cookie Board. Lo and behold, I give you Snickerdoodle Blueberry Cookies.


They are super tasty and a great way to mix up traditional snickerdoodles, as well as use some antioxidant filled fruit. Makes them healthy, right?
 

Here's the recipe:

Blueberry Snickerdoodle Cookies
by Kerry of Bakergirl

1/2 cup (1 stick) butter, softened
1/2 cup vegetable oil
1/2 cup granulated sugar
1/2 cup powdered sugar
1 large egg
2 heaping cups all-purpose flour
1/2 teaspoon baking soda
1/2 teaspoon cream of tartar
1/4 teaspoon salt
1 cup fresh blueberries*
1/4 cup granulated sugar & 1/2 tablespoon cinnamon for rolling cookies in

Preheat oven to 375°F.
Beat together butter, vegetable oil, granulated sugar, powdered sugar, and egg. In a separate bowl, combine flour, baking soda, cream of tartar, and salt. Slowly beat flour mixture into the butter mixture. Gently fold in the blueberries, being careful not to crush them - otherwise, you'll end up with purpleish-blue cookies.


In a small bowl, combine the 1/4 cup granulated sugar and cinnamon.


Shape dough into 1-inch balls, then roll in cinnamon-sugar mixture. Place balls 3 to 4 inches apart on a greased baking sheet. Kerry suggested flattening the cookies slightly with a flat-bottomed glass dipped in cinnamon-sugar. I didn't do that and I like the shape mine turned out. If you do do this, remember to be careful and not to totally crush the berries or else ... blue cookies.


Bake for 11-13 minutes, or until edges being to slightly brown and a toothpick inserted into the center of the cookie comes out clean. Allow to cool.


Makes about 2 1/2 dozen cookies.

*Because of the fresh berries, these cookies are best eaten within 3-4 days of making. 

Source: Adapted from Sunset, 1998. 


Look at that oozing berry! And ohhh, they are so scrumptious and unfortunately all gone.

Sunday, September 25, 2011

Speechless Sunday: Welcome, Fall

via

Since, I feel like Mr. Summer cheated us here in Oregon, I have hesitated to be very welcoming to Mrs. Fall. Not that I don't love Fall, cause I totally do: the cooler days, rain, leaves, hot chocolate, football games, long sleeves and scarves, sweatshirts and all the holidays - I just love and missed summer. As most of you all know, Fall did officially begin a few days ago, and frankly, this picture gave me the little push to be excited about it all. And I will try not to hold a grudge against Mr. Summer.

Saturday, September 24, 2011

Portland Photo Safari: F-Stops & Shutter Speeds

As mentioned Thursday, Michelle and I went on a Portland Photo Safari as part of my birthday gift from my mom. (Thanks, Mom!) It was a Groupon deal a month or so ago and I'm so thankful my mom snagged one for Michelle and me.

These 2.5+ hour "safaris" include 45 minutes to one hour of instruction, outdoors in downtown Portland by veteran photographer, Jennifer Costello. (She has done something like 400 weddings!) After learning, or being retaught many things I once learned in a photography class, but this time, in a much conciser format, which was consequently, way easier for me to remember remember, we started walking around downtown Portland trying to accomplish different photo tasks Jennifer gave to us. She was so helpful and gave feedback any time you asked.

Here are a few of my shots, unaltered (with the exception of resizing) by Photoshop.

Depth of field practice. Nothing too spectacular. Michelle's is way cooler. :)

Adjusting white balance.


ISO experimentation - from top left, to right: 400, 800, 1600, 3200 -- The higher the ISO, the more light, but the grainier images become, too.

Just in time for Halloween, my favorite photos I captured. One of the smallest parts of a strange statue on the sidewalk.

One of my favorite things Jennifer said was what a professor once told her, "When you figure out what subject you are going to shoot, find an alternative angle than the original 'shot' you saw." She encouraged us to walk around subjects and to look at everything at different angles because shooting subjects differently than the majority of the world views them makes for very interesting photography.

I really enjoyed being able to practice while being taught. Jennifer called this safari something along the lines of "auto intervention," meaning we would understand how to shoot in manual when finished with class. She was right. I do get what I'm supposed to do in M mode, but need loads more practice cause I still have to think far too long to adjust the camera. I highly recommend the safari for anyone who feels uncomfortable with all the settings on their camera, point and shoot or DSLR.

Thursday, September 22, 2011

The Superbly Lovely 24th Birthday Weekend Recap

One week ago today, I shared my birthday with one of the sweetest little girls in the whole world. She turned two and I turned 24. Aye aye aye, where does time go?

Photo credit: Michelle. Taken on the morning her her 1st (my 23rd) birthday. See 2 years ago here. Is it super awful we have to stage our 2nd & 24th birthday picture on Tuesday because we didn't get one at the party this year?!

Last Friday, I went on a little photography safari in Portland with Michelle. (Details tomrorow!) That night, my sister, mom and I saw The Zac Brown Band in concert. They were awesome and had loads of energy. Saturday was our September Book Club meeting, where we discussed, The Body Project by Joan Jacobs Brumberg. Then, Sunday was the big shared birthday party, hosted by Ellie's mom and dad, my awesome friends, Steve and Michelle. There was so much food, including bacon wrapped potato bites and 3 cakes, one based on these Lemon Poppyseed Strawberry Buttercream cupcakes I made. Unfortunately, I didn't get any pictures because fortunately, I was nice and busy chatting it up with guests. Michelle did post a few, if you're interested.

I received some very thoughtful and useful gifts this year, a few of which I just have to show you! Really, I am very excited about them all, as they were nearly all unexpected.

My friend, all the way back from preschool, Steph, gave me this little hummingbird necklace I just adore. Plus, I got to see her twice this weekend, once at book club and then at the party.


Allison gave me these two awesome stands for cupcakes and a cake. I looooove the oil rubbed bronze-esque pastry stand. It will fit any event. The white ceramic cake stand is completely customizable to any event or season, by just adding ribbon to the holes around the edge. Oh so excited to use both of these. No doubt, you will soon see them in pictures for the blog. :)


Since I already mentioned cakes, I'll also say I just can't wait to use my new whoopie pie pan from Cara in Austin! I even got to open it in front of her via Google Hangout, along with Kaycie & Erich in Baton Rouge. (If you haven't tried it yet, you must. It will trump Skype soon enough. If you have no idea what I'm talking about, ask me and I will gladly be Google's unofficial spokesperson on the topic.)

Michelle gave me the three frames pictured below. I hung them above my messy craft desk, I chose not to picture. I just love the color scheme. It is perfect!


She ordered the dandiloin print from Etsy and made the other two herself.


She knew I love specimen art (as mentioned here), but have yet to make any for myself.


Thanks everyone for starting off my 24th year with so much love. I had a great weekend and am so blessed to have you all in my life!

Wednesday, September 21, 2011

September Book Club: The Body Project

I can't believe we already had our second book club meeting this past weekend. This month, we met to discuss The Body Project by Joan Jacobs Brumberg. I'll be honest, but I have to whisper it, because I'm just slightly embarrassed: I didn't finish the entire book. Turns out, it was no big deal, mostly because I was still able to participate in the discussion since it was a non-fiction book, with most of our questions being very relevant to our own experiences as females. And no one tsk, tsk'd me.  

Warning: I'm not attempting to write a synopsis or critique of the book, because I'm not in school and just like to think, however scatter-brained that turns out. So for now, just offering a few thoughts I found intriguing for you to chew on a bit.

The book dives into historical detail (through the 1990s) of issues girls face today. Brumberg focuses on how "...the body has become most girls' primary project, creating a degree of self-consciousness and dissatisfaction that is pervasive and often dangerous" and the various reasons why this is the case. It was a very informative book and will have you go "ah-ha" at moments, want to cry the next, scream or rip a pillow in half in frustration.


With the best chocolate chip cookies you can buy from a store in the world (shout out to Safeway & Thanks, Alison!), pink lemonade (my favorite) and a veggie try with yummy dip (Thanks, Amy!), we discussed what we "have gained and lost as American women shed the corset and the ideal of virginity for a new world of dieting and body sculpting, sexual freedom and self expression." A time or two, the question arose, are we freer now than we were 100 years ago? Depends on your definition of freedom. What do you think?

I would highly recommend this book to any woman, particularly those struggling with body image or wanting to gain a broader range of knowledge on the subject. I plan on reading a few more books on the topic, including re-reading Reviving Ophelia.

To wrap this up, I wanted to take a quick moment and point you in the direction of the lowest part of the right hand column on this page. Scroll now. A little more, and there you see it: my GoodReads widget displaying some books I have read. If you like to read, want to get back into reading or fall somewhere in the middle, check out GoodReads. It is a brilliant website that allows you to create lists of books you want to read, have read and are currently reading. You can see reviews on books from your friends and others, as well as write reviews and rate books yourself. There is a phone app too! It has one of those sweet bar code scanners that I just love, but has proven to be very dangerous near any bookstore, as I can go a bit overboard with it. Anyways, there is my unofficial, unpaid plug for another tech service I use. Do as you wish.

Tuesday, September 20, 2011

Baked Chicken Cheese Filled Rolls

Oh boy, do I have a recipe to add to your weekly dinner plans! If you plan that far ahead, that is. But seriously, check out the ingredients, put them on your grocery list and give this easy chicken dish a shot. No one will be disappointed. I'm sure.


My mom and pickiest eater in the fam, my 14 year old sister came over to try out this meal for dinner She even liked it, which made my mom quite excited to be able to add a new recipe to mix up dinners with.

Not surprisingly, I found this recipe on Pinterest. (Maybe my blog should be re-titled to "Made from Pinterest.") Anyways, it was originally posted by Steph from Plain Chicken. I just realized that this is the same blog that posted the recipe I based my super addicting Bacon Ranch Cheese Pull Apart on. Hmmm. She sure knows how to please. I will be scoping out the rest of her site, instead of waiting til one of her other surely delectable recipes pops up on my pinterest feed.

Here's the recipe Steph adapted from recipezaar.com:

2 (8 ounce) cans Reduced Fat Pillsbury Refrigerated Crescent Dinner Rolls
1 (10 3/4 ounce) can 98% fat free cream of chicken soup, undiluted
3/4 cup grated cheddar cheese or swiss cheese (or any cheese of choice)
1/2 cup milk

Filling
4 ounces cream cheese, very soft (fat free or less fat work fine)
2 tablespoons butter, very soft but not melted
1/2-1 teaspoon garlic powder
1 tsp minced onion flakes
2 large cooked chicken breasts, finely chopped (or use about 2 cups, can use cooked turkey)
1/2-3/4 cup finely grated cheddar cheese
1/2 tsp seasoning salt
1/2 tsp ground black pepper (or to taste)
2 Tbsp. milk
1-2 cup grated cheddar cheese (for topping)

Set oven to 350°F. Spray a 9x13 dish with cooking spray. Mix together milk, 3/4 cup cheese and undiluted chicken soup (can season with black pepper if desired). Set aside.

To prepare the filling,  make certain that the cream cheese and butter are very soft.  In a bowl, mix the soft cream cheese with butter until very smooth, then add in garlic powder. Add in the chopped chicken, onion and cheddar cheese; mix well until combined. Add in 2 tablespoons milk; mix to combine (add in a little more if the mixture seems too dry). Season with seasoning salt or white and black pepper to taste.

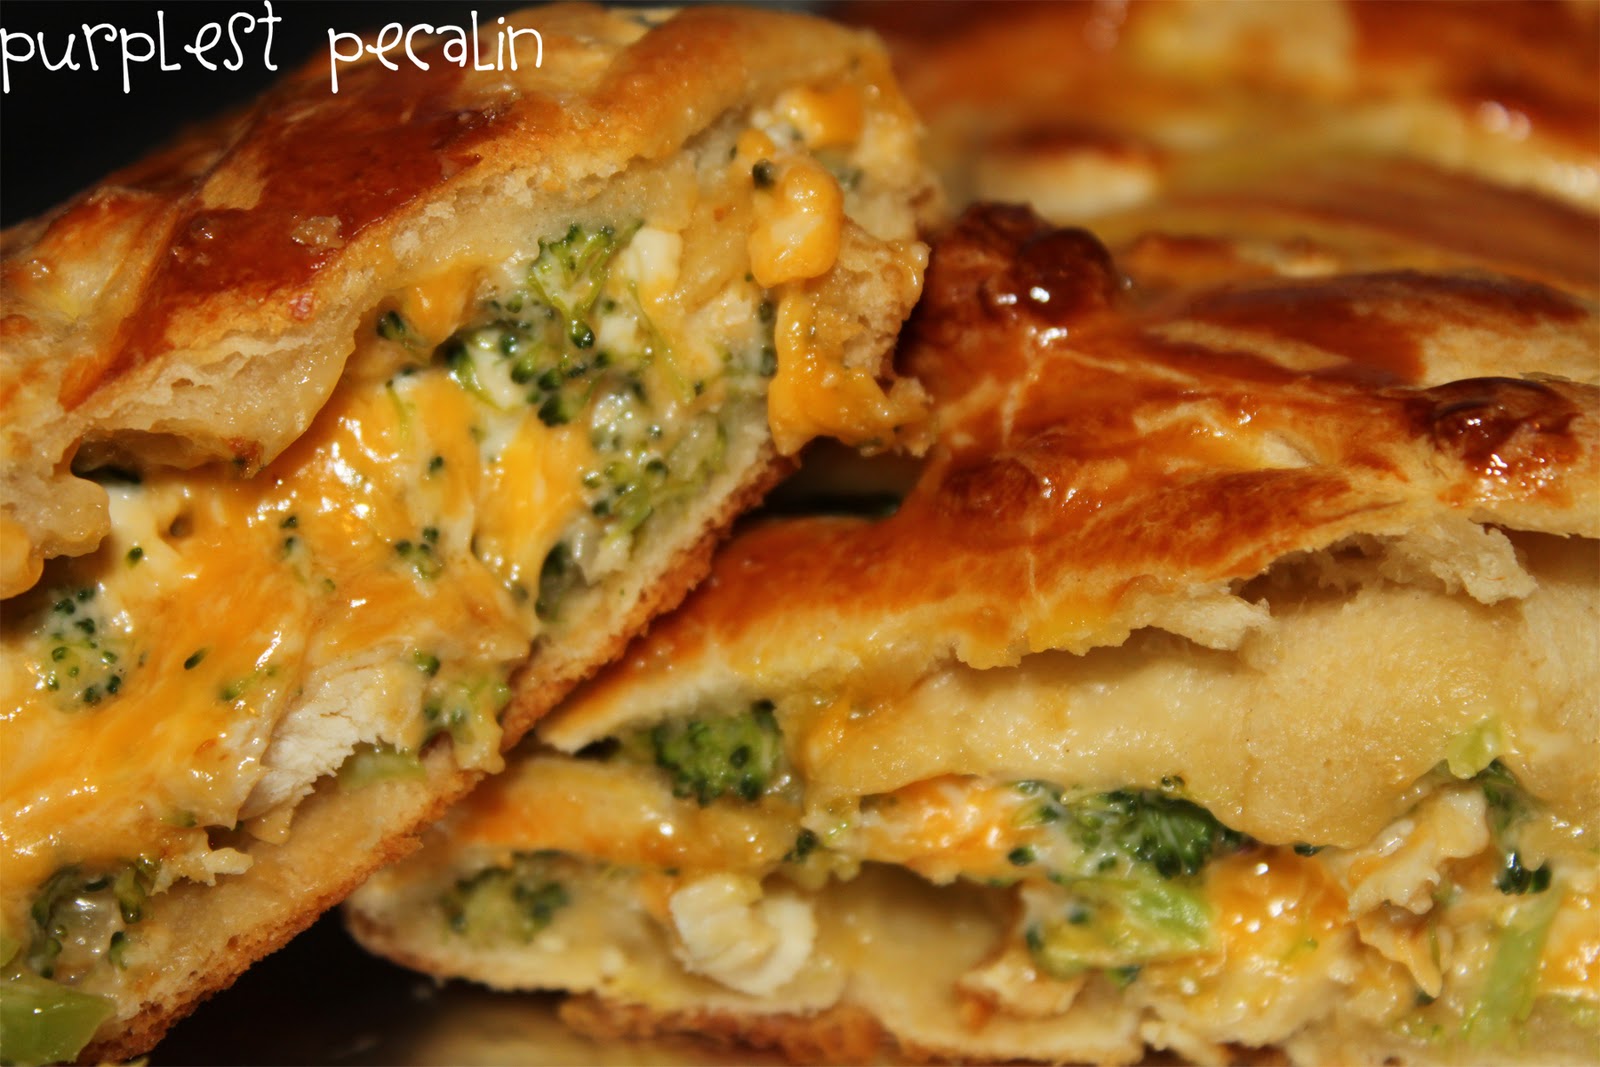
Unroll the crescent rolls. Place 1 heaping tablespoon chicken mixture (or a little more) on top of each crescent triangle, then roll up starting at the thicker end. Drizzle a small amount of soup mixture on the bottom of the dish. Then place the crescent rolls seam-side down on top of the creamed mixture in the casserole.

Drizzle the remaining soup sauce on top (you don't have to use the full amount, just use as much as desired) and sprinkle with 1 cup (or more) grated cheese, or amount desired. Bake for about 30-35 minutes.


I edited the directions, as I found them a little scattered. You could totally prepare the filling the night before, so come dinner time, assembly is all that is required.

I took leftovers to work the next day and it tasted just as yummy, if not better (maybe I was just super hungry) than the first night. Who can deny cheese and bread? Not me.

Monday, September 19, 2011

Chocolate Chip Cookie Oreo Brownie Bars

I thought about titling this post, "Not Quite As Pretty As The Picture, But Still Super Yummy Chocolate Chip Cookie Oreo Brownie Bars," but that is just giving it away. Plus, it's a little long winded.

See the little Halloweeny twist snuck in there?

You see, I've been pinning these ridiculous looking dessert concoctions of multiple different treats wrapped into one on Pinterest. They are just so insane looking, my sister and I attempted one of these monsters tonight. And well, we went step by step according to Amanda's recipe on her blog, Kevin & Amanda. See?


I have to admit, more than once while baking, I used the oven light to peek at the treat. And at least half the times I looked, I wagered with myself that the next time I checked it, the sugary goodness would be spilling over the edge of the pan. This is a lot for one 9x13 inch pan to take. Two things I noticed: lots of brownie batter squeaked between the oreos, mixing in with the cookie dough, so the layers are not so apparent, as it just looks like one big brownie. Second, the middle took quite a while to bake, in our oven anyway. We should have left ours in for an hour or 5 minutes more because the middle was a little gooey, hence the crust piece pictured.


Needless to say, although it looks nothing as pretty as Amanda's picture, it had to have tasted just as incredible, you know, if you're into the chocolate chip cookie-Oreo-brownie sort of thing.

Sunday, September 18, 2011

Speechless Sunday

Happy 2nd birthday Elizabeth Kay Waters! I had so much fun celebrating with you today! I am looking forward to many more years together, watching you grow and being birthday buddies. Please keep me young, okay?


It's hard to believe it has been two entire years since this moment. I love you loads. And then some. Thanks Michelle for such a wonderful 24th birthday with your baby girl! You are the best!

Friday, September 16, 2011

Fabric Crushes

You could lock me up in a fabric shop and I wouldn't sleep, but stay up all night looking through and planning things to do with the fabric. I just love looking at and touching it. One of the very first posts on this blog was Fabric: The. Best. Thing. Ever. Seriously though. I get super excited when I find a new place to peruse. This happened just recently, and I bought a few new pieces, and also took some pictures of prints I wanted to buy, but instead will just have to share. (The stuff I brought should show up in a few projects soon enough!)

I really really love this color scheme. Plus, I'm super drawn to anything map and travel related.


How bout this one? The colors and the characters are just perfect.


Okay, so I have to share something I actually bought. I can't wait to turn it into something for Christmas!


What do you get far too excited over? Stamps? Paper? Fabric, too? :)

Tuesday, September 13, 2011

DIY Taggie Blanket

Two of my friends had baby boys in July and I am (ugggh) just getting around to finally getting baby gifts made and sent off. I was quite excited to make something for little boys, as I really have only had little girls born around me lately ever.


Have you ever noticed how babies love the tags on blankets and stuffed animals? Probably. Well, I have seen these taggie blankets in stores, but thought since I have too many spools of ribbon for my own good, I should put them to use and make my own version.


Here's what you need to make one too:

18 x 14 inch piece of cotton
18 x 14 inch piece of flannel
ribbon, about 8-11 yards total (33 three to four inch pieces) -- I wanted to use varying widths so you may need a few more, if you use all the same width ribbon.

Note: Those supplies are just what I used. You can make yours smaller or bigger and add more or less taggies depending on what ribbon you have on hand, or what you think looks best. (Buying 1/2 yard of the two coordinating fabrics allows you to make 3 of these, but using 2 fat quarter would work just as well to make one.)

Here are the steps I took:


1. Cut your pre-washed fabric to desired size, in my case, 18x14 inches (about 1/3 of a half yard cut of 44" pre-washed fabric) and cut your ribbon into 3-4 inch pieces. I made mine longer if they were thicker. I just thought it looked better.

2. Pin the folded ribbons to the right side of one fabric, arranged as you want them to be. Sew all the way around to secure the ribbons.

3. Pin both pieces of fabric, right sides together. Use pinking shears, if desired around edges. Sew nearly around entire rectangle, leaving a couple inches for turning.   Then turn, inside out.

4. Don't forget to stitch up the last couple inches, then you're done!

There you have it - easy and handmade, just the way I like gifts to be! Please don't hesitate to ask any questions, cause I will be happy to answer.

Update: Here is a picture my friend sent me of her little boy enjoying his taggie blanket.


What a cutie patootie, huh?

Monday, September 12, 2011

First Day of School - Ever!

My niece, Addison, started school today. First day of school in her life. That is just so crazy to me. It's just preschool but because I'm her Auntie, I can't help but share a couple pictures my sister took of her this morning.


That is her lambie in her coat that she wouldn't let go of and had to take to school to "protect" it.

This is just outside her school. Isn't the gate adorable? (That is also her "I'm smiling" smile.)

She said that she "made lots of new friends" today at school. I can't believe she is old enough to go to school. The years really do just fly by the older I get. I am super excited to hear more of her stories from school.

Sunday, September 11, 2011

Speechless Sunday: 10th Anniversary of 9/11

Here is another not quite speechless Sunday post.

So many memories and stories shared today have made me cry, smile, given me goosebumps and feel so proud to be an American. Although, our country is far from flawless, I am so thankful to have the opportunities I have had, simply due to my American citizenship. I feel like I don't have many words to express myself today, like each 9/11 for the past 10 years, but without sounding like a broken record, here's my best.

Many have given their lives selflessly and so many others (families and individuals) sacrifice every day to protect us. Today, I remember and honor those who are no longer here, all who have lost a loved one and the rest of us who were all affected in one way or another by the events that occurred on September 11, 2001. I am eternally grateful.

Photo credit: TIME magazine

This is one of my favorite pictures from the 9/11 footage. To wrap things up with hope, because there is always hope, here is one of my favorite quotes, by one of the most intelligent men of our time:
"No one is born hating another person because of the color of his skin, or his background, or his religion. People must learn to hate, and if they can learn to hate, they can be taught to love, for love comes more naturally to the human heart than its opposite."  -- Nelson Mandela
God bless everyone.

Thursday, September 8, 2011

Planes & Peter Pan, Birds & Superman

The best way of travel, however, if you aren't in any hurry at all, if you don't care where you are going, if you don't like to use your legs, if you don't want to be annoyed at all by any choice of directions, is in a balloon. In a balloon, you can decide only when to start, and usually when to stop. The rest is left entirely to nature.
— William Pene du Bois, The Twenty-one Balloons
A wee bit ago, my dad took flight on his maiden voyage into the skies. He has flown planes before, but never ridden in a hot air balloon. The flight was a gift from his mother, sister and brother for his 50th birthday.


By far, out of the couple dozen balloons to lift off that morning, the one he rode in was the prettiest. Have you seen a better looking balloon? (It was handmade by the pilot herself!)


His particular ride was part of a bigger event in our hometown, the Northwest Art & Air Festival.


Being post-poned 2 days due to lightning storms and such, the flight was reportedly even more magical and worth the wait. I really would like to go on a ride some time. Sooner rather than later. From what I hear, it is a wonderfully peaceful experience - when the torch isn't lit.

Tuesday, September 6, 2011

Peanut Buttery Goodness

I'll admit it, I'm not really a fan of peanut butter. How un-American of me, I know. I really have to be in the right mood for it and that doesn't happen too often. Once in a blue moon, nothing sounds better than a PB&J, but I choose almost any other cookie over a peanut butter one. This morning, I saw Nicole's recipe from Davis Domestications, knew I would be baby-sitting my niece who likes PB and thought we should try them out.


I think I left the first two trays in the oven a little long, as they were a little crispier than I prefer my cookies. Last couple trays were left in for 7-8 minutes, instead of the suggested 10, and they came out much better. My absolute favorite part was the filling. As much as it looks like plain peanut butter, it isn't! Here it is in all its simplicity:

     3 T butter, softened
     1/2 cup creamy peanut butter
     2 1/2 T heavy whipping cream
     1 cup powdered sugar

     Combine all four ingredients until smooth.


It could be used to frost cupcakes, as filling for other cookie sandwiches, or on toast. It is quite yummy, without the sticking of your tongue to the roof of your mouth every bite. I will definitely use the frosting for something else in the future.
Related Posts Plugin for WordPress, Blogger...